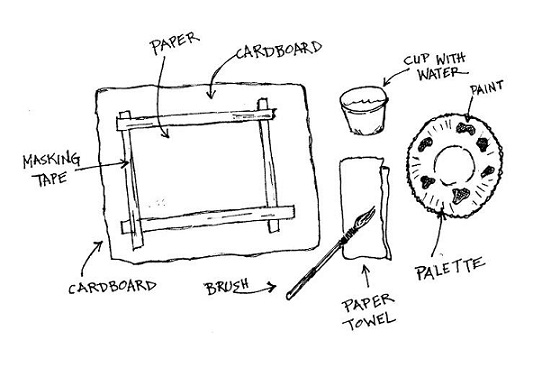
Ready to start painting with watercolors? Here’s how I set up my space before I paint.
SUPPLIES:
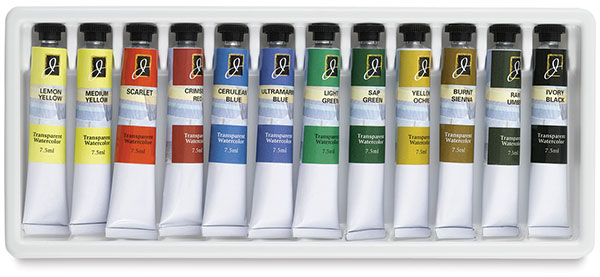
1. Watercolor Paints – I prefer using paints in tubes, although pan sets are convenient for when you are traveling or working outside and need to carry your paints.
2. Palette – this is the surface the artist puts his/her paints on. If you don’t have a palette, a Styrofoam plate is a good option. The plates are large enough to provide mixing room, and because they are white you can see the true colors of the paints. If there is leftover paint after you’ve finished working, cover the palette with foil or plastic wrap. You can use the same paints again next time; they just need to be moistened with a wet brush, and they’ll work fine. If the paints are gone or too mixed up, just throw it away and start again with a fresh palette next time. Some stores sell small plastic palettes that have about 8 small wells to hold the paint, but I’m not a fan of those. They are too small for mixing colors, and the paint doesn’t seem to stick to it at all, but rather gets absorbed in the brush right away.
3. Container with Water – Coffee mugs make great water containers, as they are heavy enough that they won’t tip over. Clear mason jars work well too. If you’re working with a class, it’s helpful to have one cup/container for each student, placed on the same side of their painting as the hand they paint with. In this way, they aren’t crossing over their painting with a brush full of paint or a clean wet brush. When that happens, it’s more likely they will leave paint or water drips on their work.
4. Paint Brushes – Round brushes are my favorite when painting with watercolors, probably because they are the most versatile. They can be used to cover an area with paint as well as make fine details with the tips. Have on hand at least one large round brush and one small one. A large flat brush is also nice for doing washes.
Remember: Never push your brush across the paper or rub it on the paper. You will most likely put a hole in your paper and/or ruin your brush. Instead, I tell my students to “brush the brush”, stroking back and forth. If the paint doesn’t go on smoothly, or there are white spaces left on the paper after you’ve picked up your brush, you probably don’t have enough water on it.
5. Paper – students will notice that watercolor paper is thicker that copy paper or drawing paper. This is because paper tends to buckle and wrinkle when it’s wet; the thicker the paper, the fewer the wrinkles and waves. Watercolor paper is sorted by the weight of the paper when it’s still in large reams, and a minimum of 90lb. paper should be used. Paper any thinner than this tends to tear when it gets too wet or if the students rub it too much. 140 lb. paper is even better.
6. Smooth Backing for the Paper – I typically use foam board, but smooth cardboard, gator board, or mat board also works. Use a piece that’s larger than your paper as a backing for your painting. Because paper with a weight of less than 300 lb. buckles when wet, it’s necessary to tape the paper to a smooth surface and leave it there until it is completely dry. Don’t worry, then, if it buckles while painting – it will dry flat. The tape can then be removed. Depending on how you place the tape, this can provide the nice effect of a solid white border around the painting.
7. Masking Tape or blue painters tape – I usually use masking tape because that’s what I have on hand. However, get a good quality masking tape; cheaper tapes tend to make the paper tear when you’re removing it.
8. Paper Towels – placed on the same side as your working hand, just like the water container. This is for gently blotting your brush after you have rinsed the paint out of it. Never pound your brushes on the paper towel – it will ruin the brush.
This will be the setup for right-handed students when working on each watercolor lesson. If the student is left-handed, the paper towel, palette, and cup of water will be on the left-hand side.


Please note: Only family-friendly comments will be published.